Integrate Apple Sign In and avoid AppStore Rejection
In WWDC 2019, Apple introduced a new way to sign in to apps called “Apple Sign In” available only in iOS 13 as of now.
Is it Mandatory for me?
While the deadline for integrating “Apple Sign In” in existing apps and app updates is April 2020, all new apps uploaded to App Store that exclusively use a third-party or social login service (such as Facebook Login, Google Sign-In, etc) must also offer Sign in with Apple as an equivalent option.

If you are in a hurry or just too lazy to dive into the black hole of Apple docs, here’s a step by step guide on how to integrate ‘Apple Sign In’ in your iOS app.
Xcode Configuration
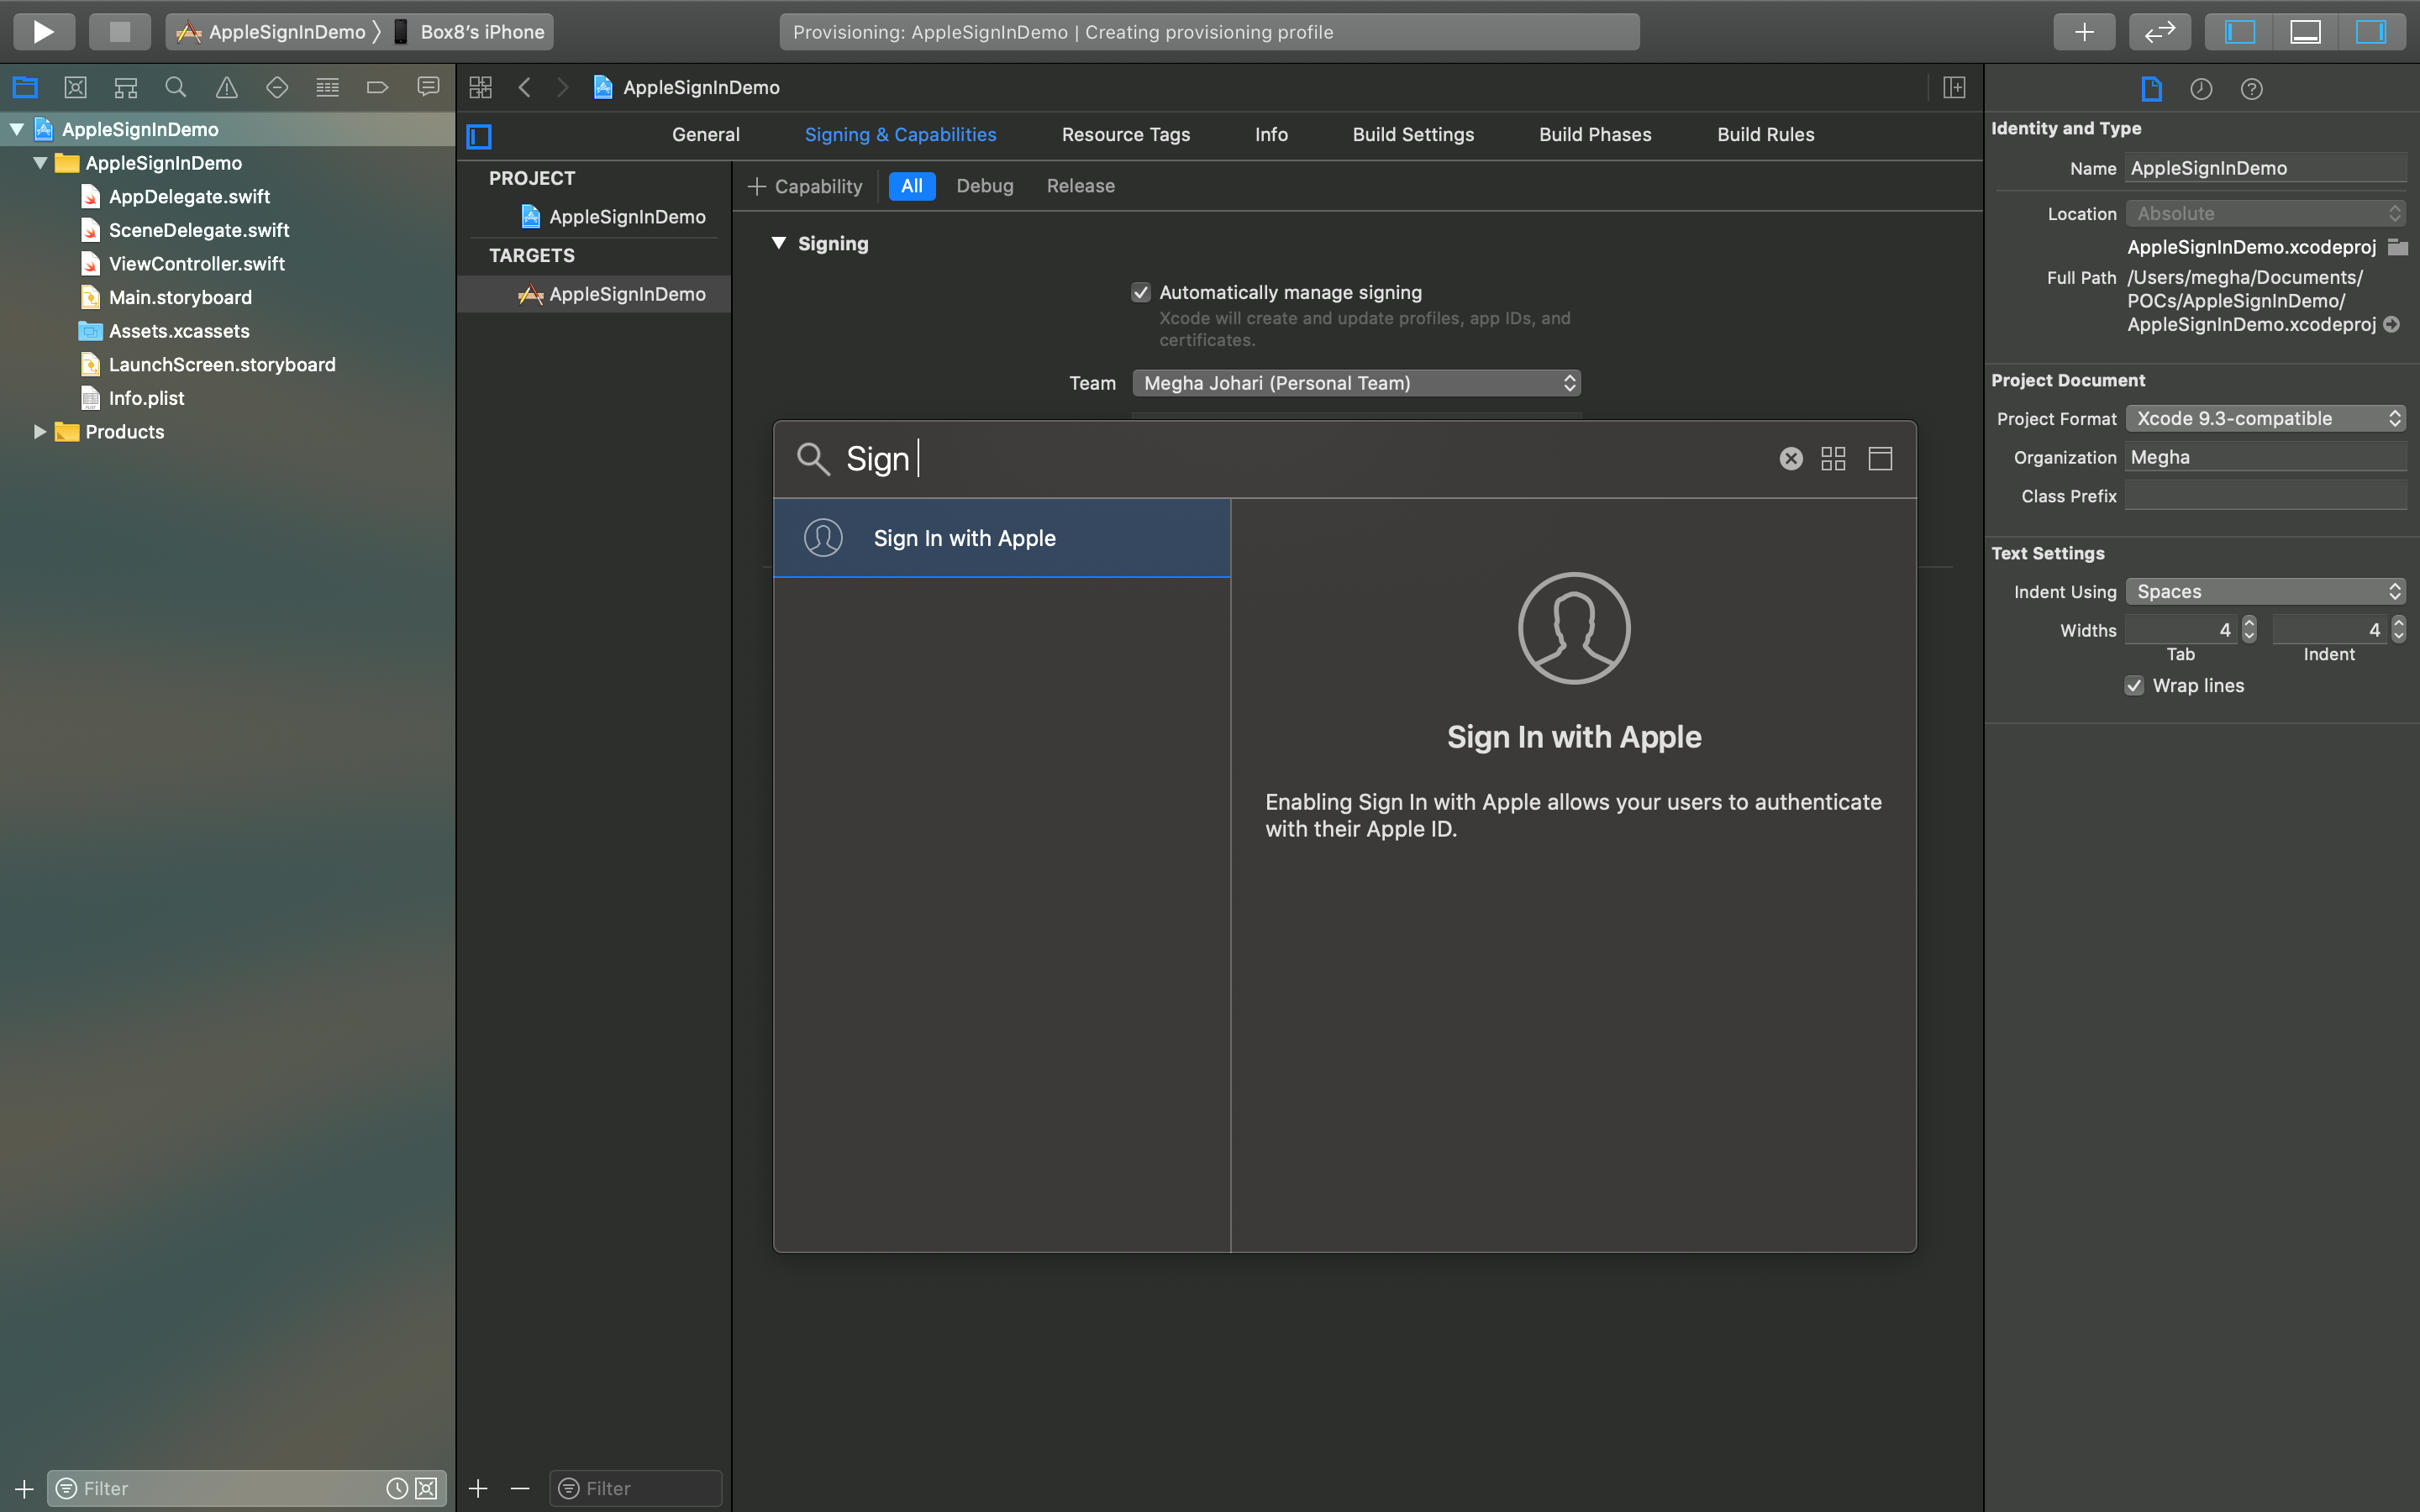
- After selecting your project target, tap on Signing & Capabilities
- Click on “+” icon to add a Capability
- Check for Sign in with apple
- Add the capability by double-clicking on it.
This will handle the addition of the required entitlement file that lets the app use Apple Sign In.
Adding ‘The Mighty’ Button
Initialize AuthenticationServices in your app
import AuthenticationServices
Apple has already provided APIs for creating Sign in with Apple Button. We will use ASAuthorizationAppleIDButton, which is a subclass of UIControl. Follow Human Interface Guidelines when attempting to customise it.
Create the Sign In Button using ASAuthorizationAppleIDButton in viewDidLoad().
override func viewDidLoad() {
    super.viewDidLoad()
    setupAppleSignInButton()
}

func setupAppleSignInButton() {

    let signInButton = ASAuthorizationAppleIDButton()
    signInButton.frame = CGRect(x: 0, y: 0, width: 200, height: 42)
    signInButton.center = self.view.center
    signInButton.addTarget(self, action: #selector(appleSignInButtonClicked), for: .touchUpInside)
    self.view.addSubview(signInButton)
}
User Authentication
It’s time to authorise user when they click on Sign in Button. We will create ASAuthorizationAppleIDRequest which will make the authorization attempt.
@objc func appleSignInButtonClicked() {

  // Create an ASAuthorizationAppleIDRequest that relies on the user’s Apple ID
    let appleIDProvider = ASAuthorizationAppleIDProvider()
    let request = appleIDProvider.createRequest()

  // Specify the contact information to be requested from the user during authentication
    request.requestedScopes = [.fullName, .email]

  // Creates a controller from a collection of authorization requests
    let authorizaionController = ASAuthorizationController(authorizationRequests: [request])

  // Set the delegate as 'self' which will be informed about the success or failure of an authorization attempt.
    authorizaionController.delegate = self

  // Starts the authorization flows named during controller initialization.
    authorizaionController.performRequests()
}
Handle Authorization Response
If the authentication succeeds, the authorization controller invokes the authorizationController(controller: didCompleteWithAuthorization:) delegate function else authorizationController(controller: didCompleteWithError:) is invoked.
Add the following delegate methods to handle response returned from Apple Authentication Services.
extension UIViewController: ASAuthorizationControllerDelegate {

  public func authorizationController(controller: ASAuthorizationController, didCompleteWithError error: Error) {
    // Handle Error Scenario
  }

  // This is invoked If the authentication succeeds
  public func authorizationController(controller: ASAuthorizationController, didCompleteWithAuthorization authorization: ASAuthorization) {

  // Credential contains information provided about a user after successful authentication
  if let credential = authorization.credential as? ASAuthorizationAppleIDCredential {

  // Extract identity token - A JSON Web Token (JWT) that securely communicates information about
  // the user to your app. We are going to use this token to verufy the user.
      if let signInJWT = credential.identityToken {

          let signInJWTString = String(data: signInJWT, encoding: .utf8)!

          // Full name is an optional value which gives the user's name only when he/she
          // signs in for the first time. On subsequent sign ins, the full name is returned as blank.
          let fullName: PersonNameComponents = credential.fullName!

          // Create User account in your system using token and full name
      }
    }
  }
}
Create User Account on Server Side
JWT Validation and Account Creation
- Verify the identity token (JWT) received in response from Authentication with apple public key to confirm that it has been generated from apple.
- Once verified, needful data can be extracted from the token payload like email, unique user id, etc. A token string, when parsed looks like this:
{ "iss": "https://appleid.apple.com", "aud": "com.*****.signindemo", "exp": 1580367509, "iat": 1580366909, "sub": "000000.1123456789******987654321*******.1111", "c_hash": "YdoLpJ******-****CzWCw", "email": "wsn5******@privaterelay.appleid.com", "email_verified": "true", "is_private_email": "true", "auth_time": 1580366909 } - Create a user account in your system with the above data.
See it in action!!
- Run the app and tap on Sign in with Apple Button. Make sure that Two-factor authentication is turned on for the apple id. It should open a dialogue for the user.
- They have the option to edit their first and last name before sharing them with the app (only for the first time).
- They can also choose to hide their original email in which case Apple will create a unique random email address on behalf of the user and share it with the app so that their personal email can stay private. Any messages sent to this address by the app are automatically forwarded to your personal email address by apple’s private email relay service
- They will be prompted to confirm their FaceID, TouchID, Device Passcode to sign in. If none are present, it will prompt the user to enter their Apple ID password.